
Are you tired of using the same old keyboard layout? Do you want to explore new possibilities and improve your typing experience? Building your own split keyboard might be the perfect solution for you. In this comprehensive guide, we will take you through the step-by-step process of building a split keyboard from scratch. Whether you’re a DIY enthusiast or a keyboard aficionado looking to customize your setup, this guide has got you covered.
How to Build a Split Keyboard
The Advantages of Split Keyboards
Before we dive into the nitty-gritty of building a Split Keyboard, let’s take a moment to understand why you might want to make the switch. Split keyboards offer several advantages over traditional ones. Firstly, they promote a more ergonomic typing position by allowing you to position each half of the keyboard independently. This can help reduce wrist strain and prevent long-term injuries, such as carpal tunnel syndrome.
Secondly, split keyboards offer a high level of customization. You have the freedom to choose the layout, form factor, and tactile responsiveness that suits your preferences. Unlike pre-built keyboards, building your own split keyboard gives you complete control over the design and functionality.
Understanding the Anatomy of a Split Keyboard
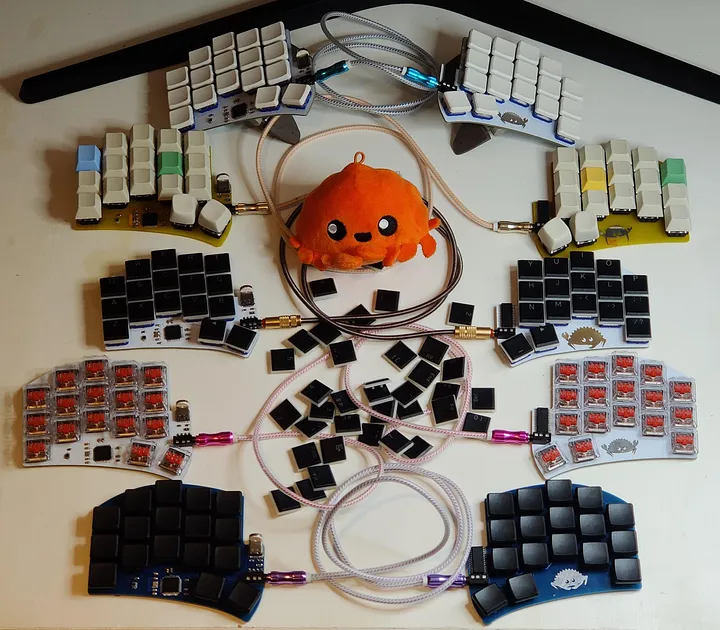
To build a split keyboard, it’s important to understand its basic components. A split keyboard consists of two halves, each with its own microcontroller or chip. One half acts as the master, forwarding events from its sibling to the computer. Communication between the two halves is facilitated through a TRRS interface, similar to an audio cable but with four channels instead of two.
To get started, you’ll need a list of components. While the supply chain for keyboard parts can be overwhelming, we’ve curated a list of essential components that fit most requirements:
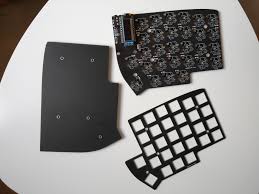
PCB (Printed Circuit Board):
The PCB serves as the electronic foundation of the keyboard. It consists of a matrix of switches wired to the main chip, which converts activations into keystroke events.
Keycaps:
These are the plastic covers that sit on top of the switches and determine the appearance and feel of each key.
Switches:
Tactile switches are responsible for registering keystrokes. There are various types available, such as MX-like tactile switches, which offer a satisfying typing experience.
Microcontrollers:
Arduino Pro Micros are commonly used as the brain of the keyboard. They detect keystrokes in the PCB matrix and send them to the computer.
OLEDs:
These small display panels can be used to show real-time information about the keyboard. They offer endless possibilities for customization.
Cables and Accessories:
Magnetic USB cables, braided TRRS cables, and 3D printed legs are some additional items you might need to complete your build.

Selecting the Right Components
Now that you have a basic understanding of the components, it’s time to select the right ones for your split keyboard. With a wide range of options available, it’s important to consider your specific needs and preferences.
When choosing a PCB, the Lily58 Pro is a popular choice. It comes with everything you need, including PCBs, plates, sockets, TRRS jacks, and screws. This makes it a convenient option for beginners.
For keycaps, the DROP + MATT3O MT3 SUSUWATARI set is highly recommended. These keycaps offer an ergonomic variant and are compatible with most MX-like tactile switches.
Speaking of switches, the DROP + INVYR HOLY PANDA MECHANICAL SWITCHES are a community favorite. These switches provide a smooth and responsive typing experience, similar to clear MX switches.
To complete your build, you’ll need two Arduino Pro Micros as the microcontrollers. These will serve as the brains of your keyboard, detecting and interpreting keystrokes.
Additionally, consider adding OLEDs to your build for real-time information display. These can be programmed to show anything you desire, making your keyboard truly unique.
Lastly, don’t forget to include accessories such as a magnetic USB cable, braided TRRS cable, and 3D printed legs for added functionality and aesthetics.
The Building Process: Step-by-Step
Now that you have all the necessary components, let’s dive into the building process. While we won’t go into every minute detail, we’ll provide a general overview of the steps involved in building a split keyboard.
Step 1: Soldering Electronic Parts
The first step is to solder the electronic components onto the PCB. Start by soldering SMD diodes alongside each switch socket. This can be a time-consuming process, so take your time and ensure the soldering iron is not overheated.
Next, connect the Arduino Pro Micros to the main PCB using Millmax sockets. These sockets allow for easy removal of the microcontrollers if needed.
Solder the OLED panels on top of each Arduino using long rigid copper cables soldered to the PCB headers. Lastly, solder the TRRS sockets and RESET buttons to the PCB.
Step 2: Lubing the Switches
Lubing the switches is an important step in enhancing the typing experience. It involves applying a special lubricant to the inside of each switch, including the spring and stem. This process smooths out the switch action and reduces noise.
Choose a high-quality lube, such as Krytox GPL 205 grade 0, for the best results. Apply a small amount of lube to each switch, ensuring even coverage.
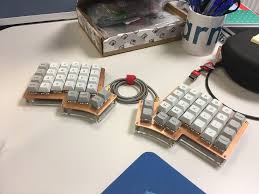
Step 3: Assembling the Keyboard
With the electronic parts soldered and the switches lubed, it’s time to assemble the keyboard. Start by connecting all the key switches to the hotswap sockets on the PCB using the provided plates and standoffs.
Create a “sandwich” by placing the PCB between the two halves of the keyboard. Secure them together using the standoffs and screws provided.
Finally, attach the keycaps to the switches, ensuring they are aligned correctly. Once everything is in place, your split keyboard is ready to go!
Step 4: Programming the Keyboard
Building the hardware is only half the battle. To fully customize your split keyboard, you’ll need to program it. The Arduino Pro Micros serve as the interface between the keyboard and the computer.
To program your keyboard, you’ll need to use a firmware called QMK. QMK is open-source and offers extensive documentation on how to build and customize firmware for a wide range of custom keyboards.
Start by customizing your keymap to suit your preferences. The Lily58 Pro supports four different keymaps, accessible through the LOWER and RAISE buttons. Take the time to think about the functions you want to assign to each key.
Additionally, you can customize the behavior of the default half, add support for OLEDs, and personalize the information displayed on the OLED panels.
Once you’ve customized your keymap, use a virtualized environment, such as QMK Vagrant, to build the firmware. This ensures compatibility with the necessary system libraries.
After building the firmware, flash it onto both Arduino Pro Micros, one at a time. This may seem intimidating at first, but the process is straightforward.
Conclusion
Congratulations! You’ve successfully built your own split keyboard from scratch. The journey may have been long and filled with research and experimentation, but the end result is worth it. Not only have you gained valuable knowledge about electronics and soldering, but you’ve also created a keyboard that meets your unique needs.
Remember, building a split keyboard is a highly customizable process. Feel free to explore different layouts, switch types, and keycap designs to make your keyboard truly your own.
If you encounter any problems along the way, don’t hesitate to seek help from online communities such as Reddit and keyboard enthusiast forums. These communities are filled with knowledgeable individuals who can provide guidance and support.
Now, it’s time to enjoy the Ergonomic Benefits and personalized experience of your new split keyboard. Happy typing!
References
People Also Asked
What components are essential when considering how to build a split keyboard professionally?
To ensure a successful build, key components include switches, a microcontroller, a case, keycaps, and a reliable firmware.
Is soldering a prerequisite for building a split keyboard, or are there solderless options available?
Both options exist. Some prefer soldering for a more secure connection, while solderless builds provide ease of assembly.
How can I customize the layout and design of my split keyboard during the building process?
Utilize keyboard layout editors and firmware customization tools to tailor the layout, key functions, and aesthetic elements according to your preferences.
Are there specific ergonomic considerations I should keep in mind when building a split keyboard?
Absolutely. Pay attention to the angle and tenting options for each half to promote a comfortable and ergonomic typing experience.
What resources and communities can I tap into for guidance and support while building my split keyboard?
Explore online forums, dedicated keyboard communities, and resources like build guides to benefit from the wealth of knowledge shared by experienced enthusiasts.